How to Cook Japanese Rice in a Rice Cooker-Japanese Taste

How to Cook Japanese Rice in a Rice Cooker

by Ayumi Matsuo

Grain Staple Food Fool-Proof Recipe

Rice, the main staple food of Japanese people, is cooked daily in Japanese households. As a staple, it holds a lot of value in Japanese cuisine and serves many purposes. It is often enjoyed along with other flavorful side dishes, is used as the base for donburi (Japanese rice bowl), is used to make onigiri (rice balls) and more.

While rice is of course eaten by Japanese families everyday, there are many people around the world who also enjoy rice as a staple food. Furthermore, there are many people who want to eat more rice dishes, or want to invest in a high quality rice cooker but don't know if the investment is worth it.

In Japan, most families opt for cooking rice in electric rice cookers over pots for convenience sake. You may have heard about how high tech Japanese rice cookers are, and they really do have a lot of useful functions. The main advantage of using a rice cooker is that it knows how the rice should be cooked. It can detect how long the rice has been soaked for, how much rice and water are in the cooker, and it knows what heat setting it should use. Another handy function about Japanese rice cookers is that they have a reservation function setting where you can indicate when you would like your rice to start and finish cooking. For example, if you would like freshly cooked rice to be prepared first thing in the morning, you can add the rice and water to the rice cooker before going to bed, and set it to finish cooking the rice by the time you wake up.

If you eat rice often, it may be worth investing in a Japanese rice cooker for all of the functions we listed above. What's more is that you can make other dishes such as porridge, mixed rice, and even cake in a rice cooker!

You may be thinking, but how can I get perfect rice every single time? We're going to give you all the tips and tricks to making fool-proof, delicious short-grain Japanese rice in the rice cooker without fail.

Overview

Prep time: 5 mins

Cook time: 35 mins

Total time: 40 mins

Total servings: 5

Difficulty: Easy

Ingredients
  • 300g Short Grain Rice
  • 400ml Water

Expert's Tip

How to Cook Japanese Rice in a Rice Cooker

A shamoji is like a large spoon used for scooping rice from the pot and dividing it into bowls and/or mixing rice with other ingredients. The material used for shamoji is usually wood or plastic. Each product has its own characteristics, such as an uneven surface to prevent rice from sticking to it, or a design that allows it to stand on its own. It is recommended to wet the shamoji with a little water before touching the rice to prevent it from sticking to the rice.

Instructions

1) Measuring the Rice

Use a special rice measuring cup for rice, and scoop two rice cooker cups of rice into the rice cooker pot.

Pro tip: The Japanese unit of measuring rice is called "Gou". (2 gou = 300g rice).

2) Washing the Rice

Add water to the rice cooker pot to wash the rice. Mix the water around with your hands, to thoroughly clean the rice, and then drain the water. After washing the rice for the first time, you will notice that the water is very murky. This is because the rice contains a lot of dust. Repeat washing and draining the rice two more times, or until the water becomes clear.

3) Cooking the Rice

Add the appropriate amount of water into the rice cooker (there is also a line indicated on the pot for the amount of water depending on how many cups of rice are added), and then push the 'start' button. All you need to do now is wait for the rice. Once it is finished cooking, it will beep or play music, depending on the rice cooker.

4) Serving the Rice

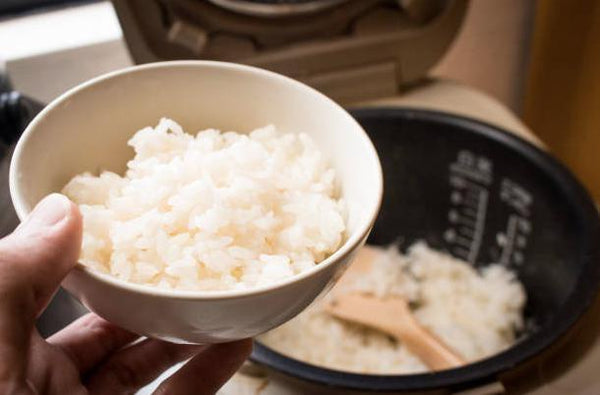
Once the rice cooker beeps, it's done! You have perfectly cooked Japanese rice that you can use for endless recipes.

Pro tip: the rice cooker will know when to start cooking the rice, stop cooking, and allow the rice to dry out to the perfect consistency. With all of these steps in mind, it may take about 1 hour for normal operation.

Recommended products for this recipe

0 comments


Leave a comment

Please note, comments must be approved before they are published